

My favorite pair yet.


 I'm gearing up to hopefully sell many pairs of wings this Halloween season through my etsy shop TruWings. In other news I'm also in the process of updated my portfolio website.
 Yup, they just keep coming. More and More coming available soon.
 I've been making wings, so many wings. The first three pair posted to my etsy store, TruWings, last week have been sold and these two are now available. (They're on sale this week only though so they're going fast) I've about 7 more in the making though. Hopefully they will start showing up online next week.

 Now this is more like it. I’ve figured out how to successfully blot the painted layers on the fairy wings – so long as I’m not going for detail. Turns out they look better when the paint is really wet and blurry since there is so much detailed being put into the veining instead.

Even this blot turned out to work just fine. I thought it was a failure; that there wasn’t enough alcohol in the wash and the colors were too harshly separated. But when I added a layer of veining over it everything came together.
I’ve also been finding that if I don’t plan anything out but just work freehand and do everything on the fly then, the pieces turn out much more interesting. This is true for both the paint wash layer and the veining.
 Fairy Wing Sample
 Failed Rorschach Blot - too dry
 Faux Feathers in Process
 Small Angel Wings Paper Pattern
 Small Fixed Frame Angel Wings in process
 Experimental Fairy Wing Layers

 Merchant of Venice
 Severed Neck Detailing
 Headless Body with Top Coat
 Demonstration of Flexibility
 Headless Body with Polyester Batting
 Lower Half of Headless Body
 Headless Body Frame
 Upper Half of Headless Body Back View
 Shoulder Socket
 PVC Upper Spinal Column
 Hinged Shoulder Blades
 Headless Body "Spinal Column"
 Fiberglass Ribcage on Mannequin
Leo Marks as Cloten, and Mark Bedard as Posthumus with the Headless Body Prop
(Photo: Jay Westcott/TBD | Date: Feb. 02, 2011)
http://www.tbd.com/blogs/tbd-arts/2011/02/the-cymbeline-cast-has-a-pain-in-the-neck-8076.html
The most challenging and interesting prop I got to build for STC was the headless body of Cloton for our production of Shakespeare's "Cymbeline." This project was very involved and a lot of fun, drawing from a number of skills including puppetry, molding & casting, and soft goods. Once I got over feeling daunted by the task I dove right in. Wooden Dowel Limbs for Headless Body Prop
 Cart Layout 3
 Existing Cart Frame
 New Cart Bed
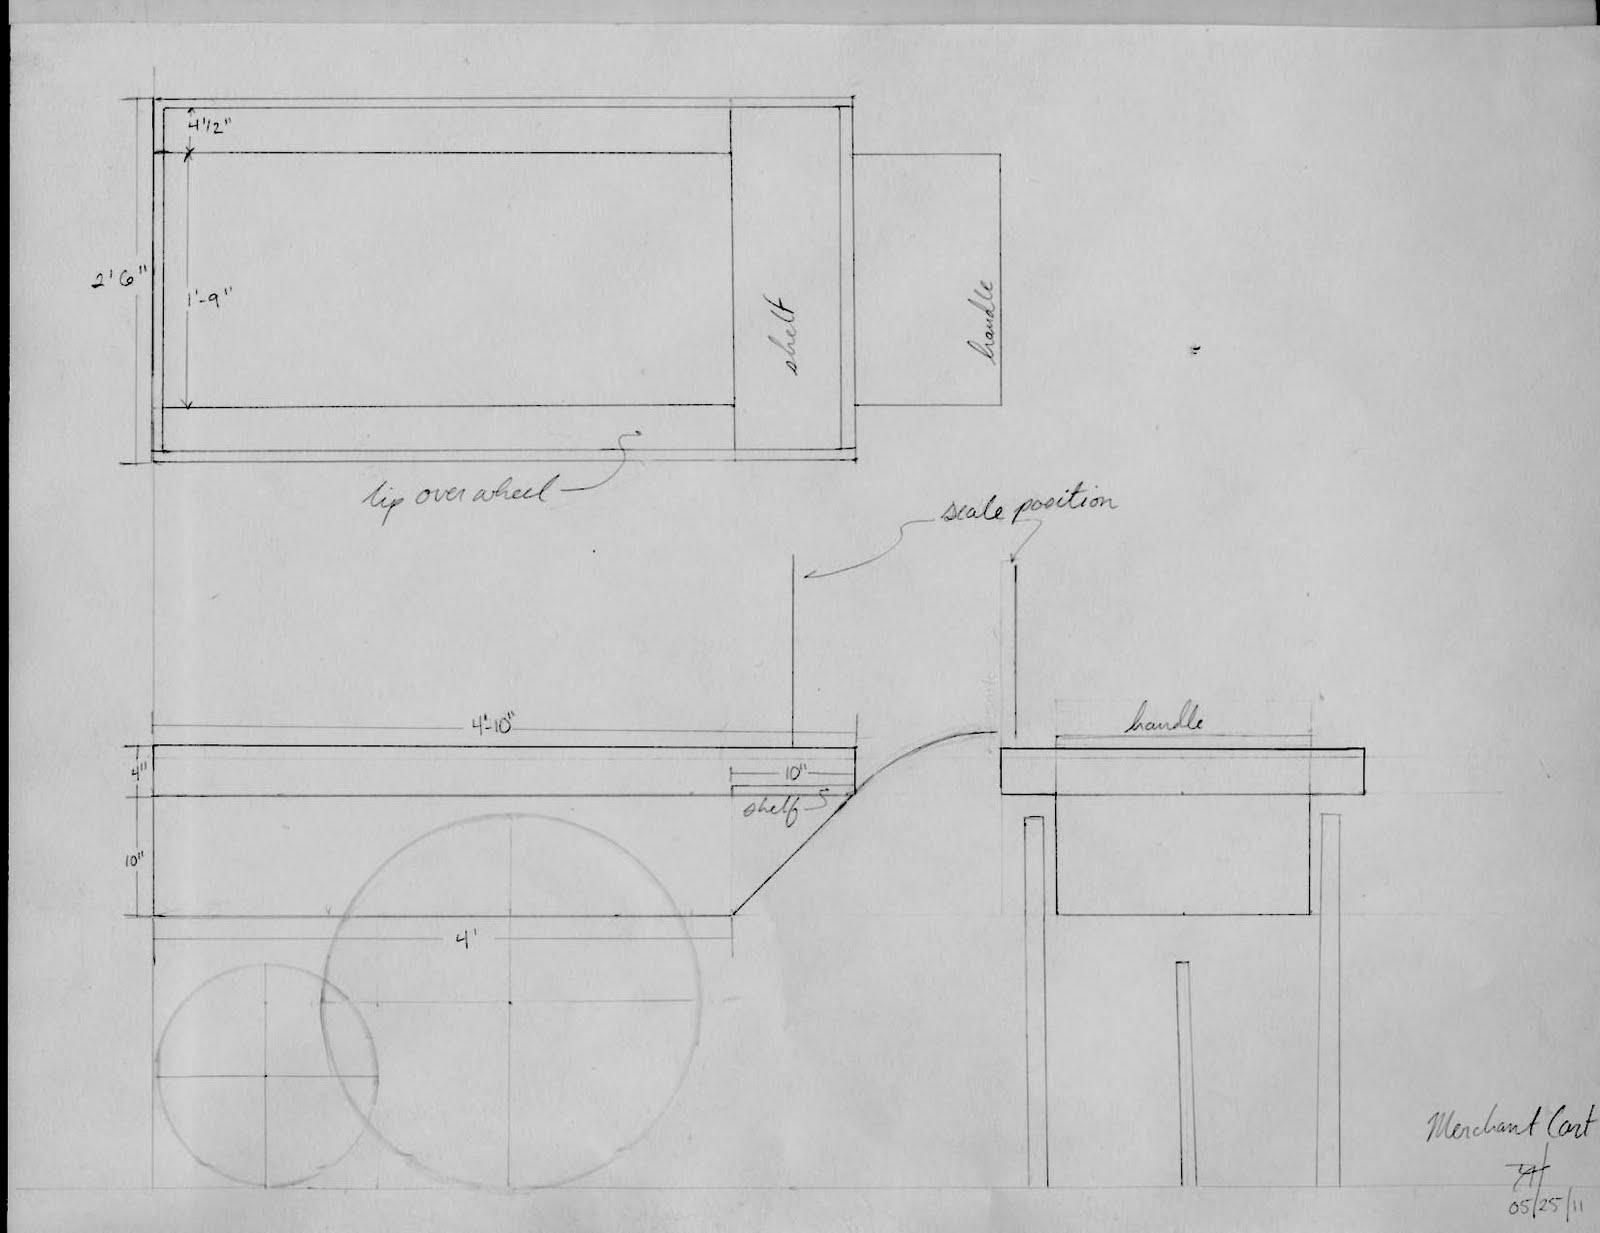 Cart Draft
 Seraph Prosthetic Completed


